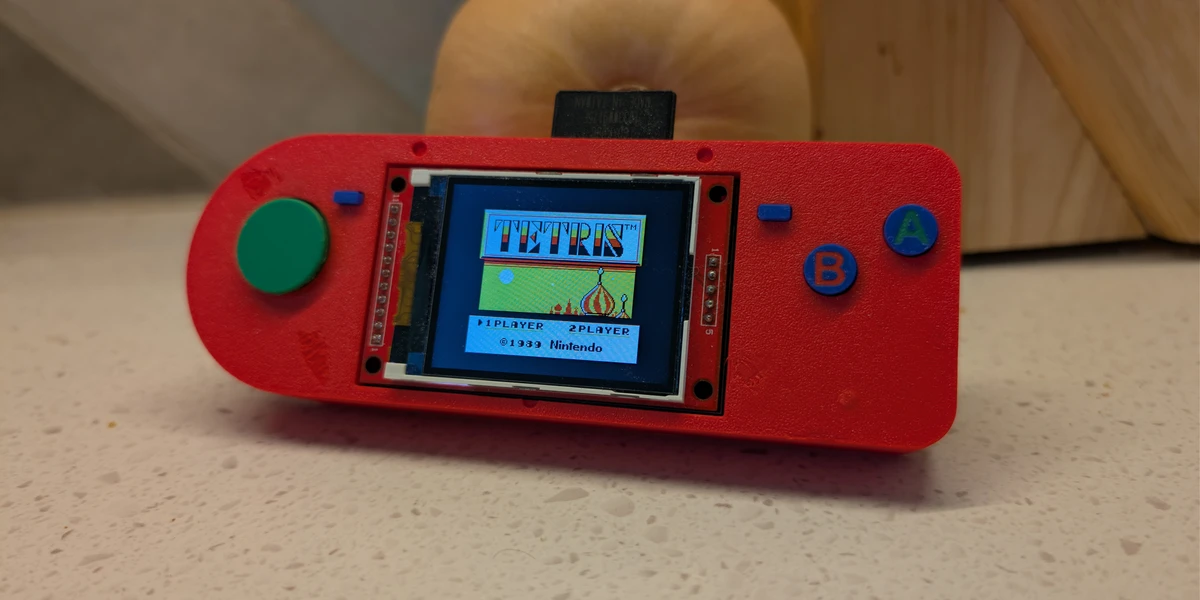
Pi Pico Boy - Handheld Gaming Device
Custom circuit board upgrade for the RP2040 PicoBoy with higher resolution display and bare-metal software enhancements
Overview
This project started as a hardware redesign of the Pico-GB Game Boy emulator handheld project. The original build uses a Raspberry Pi Pico and several separate modules wired together by hand. I liked the idea, but wanted a cleaner and more repeatable version that avoided the large amount of point-to-point soldering required by the original design.
To do that, I designed a custom KiCad PCB that integrates the supporting circuits from the original module-based build onto a single board. The board includes the RP2040/Pico footprint, display connection, button inputs, power controls, battery connection, charging/power circuitry, and the physical layout needed for a handheld form factor.
The result is a purpose-built Game Boy emulator board instead of a collection of breakout modules wired together inside an enclosure.
Project Goals
The main goals of the project were:
- Convert a hand-wired Raspberry Pi Pico emulator project into a cleaner custom PCB
- Reduce assembly complexity by replacing module wiring with an integrated board
- Preserve the core functionality of the original Pico-GB project
- Update the software to support a more modern display
- Adapt the graphics output path to handle image scaling
- Create a more polished handheld platform suitable for enclosure design and repeatable assembly
Hardware Design
The PCB was designed in KiCad and lays out the electronics as a single integrated handheld board. Rather than using separate display, button, power, and support modules, the board directly incorporates the circuits needed to connect those functions to the RP2040.
The board includes front-facing controls arranged around the display, including directional controls, action buttons, start/select buttons, and system controls. The rear side of the board contains the RP2040 module area, battery connector, USB connection, boot/reset controls, and supporting power and signal circuitry.
This turned the project from a wiring-heavy prototype into something closer to a real embedded product design: one board, defined connectors, repeatable assembly, and a layout that can be mechanically integrated into a handheld enclosure.
Software Adaptation
The original Pico-GB project is written for the Raspberry Pi Pico using a bare-metal software approach. Since that environment was not something I was already familiar with, I used GitHub Copilot as an assistant while modifying the original codebase.
The main software change was updating the display support for a more modern LCD. This was not just a pinout or driver substitution. Changing the display also affected how the emulator’s framebuffer output needed to be presented, which meant implementing image scaling so the original Game Boy resolution could be mapped cleanly onto the new display.
This made the software side of the project more interesting than a simple hardware port. The display update required understanding how the emulator generated video output, how that output was sent to the screen, and how to scale the image appropriately for the new panel.
Technical Highlights
- Custom KiCad PCB based on the Pico-GB emulator architecture
- Integrated replacement for a module-based hand-wired design
- RP2040-based handheld emulator platform
- Updated display interface for a newer LCD module
- Implemented image scaling for the emulator video output
- Used GitHub Copilot as a development assistant while modifying unfamiliar bare-metal code
- Designed with future enclosure integration and repeatable assembly in mind
What I Learned
This project was a useful bridge between hobbyist module-based electronics and more product-like embedded hardware design. The original project proved the concept, but redesigning it as a PCB required thinking through connector placement, button layout, board shape, power routing, display mounting, and assembly order.
On the software side, the display change forced me to go deeper into the emulator’s graphics path than I originally expected. What started as a hardware cleanup project became a combined hardware and firmware adaptation effort.
Skills Demonstrated
- PCB design in KiCad
- Embedded hardware integration
- RP2040-based system design
- Display interface adaptation
- Firmware modification
- Graphics scaling
- Hardware/software debugging
- Turning a prototype-style project into a more repeatable board design
Technologies Used
- KiCad
- Raspberry Pi Pico / RP2040
- Pico-GB emulator codebase
- LCD display module
- GitHub Copilot
- Embedded C / bare-metal RP2040 development
- Custom PCB design
Project Type
Personal project / embedded hardware / retro gaming handheld